Road bikes: Now you’ve got a new road bike, or at least it’s new to you. But that is the trouble, isn’t it? Everything looks similar and yet, totally different. This is a front-to-back guide for all the parts of your new road bike. Click on the parts of the picture below to learn more.
Shift and Brake Levers
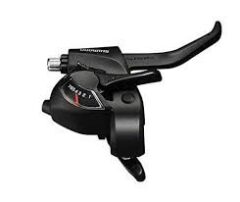
Possibly the most important part of your bicycle to be familiar with is the brake levers. In days gone by, shift levers appeared on the down tubes bicycles, forcing riders to take their hands off the bars and reach between their knees to shift.
That’s fine as long as you’re able to coast, but not very friendly if you’re pedaling uphill or sprinting for a race victory. In 1990, Shimano introduced the game-changing STI system. Ever since (regardless of which component manufacturer’s system you use), braking and shifting are controlled at the same levels. They all function similarly, but differently enough that you need to know how your system works specifically. The big three players in the game are Shimano, Campagnolo, and SRAM, with SRAM being the newest and most different.
They all have one thing in common:
- The right lever controls the rear derailleur and brake, and the left lever controls the front derailleur and brake.
Handlebars
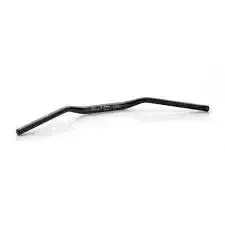
There is no mystery here: handlebars are for gripping. The “drop” style handlebar is one of the best inventions ever. If you ride your bike for more than ten minutes, you are going to want to change positions. The drop bars allow that to be done very easily, with about three or four different places you can hold the bars.
You will see riders with their hands on the drops (the very ends of the bars) when they are trying to cheat the wind and go faster. Other times, the same riders will have their hands in the middle of the bars to sit as upright as possible when climbing.
Still, more often than not, you will see most riders with their hands on the “hoods” – on top of the shifters where the bars make a 90° bend forward. There is also an endless variety of options for bar tape, which you can buy for not much money and change the look and feel of your bike in a matter of minutes.
Top Tube
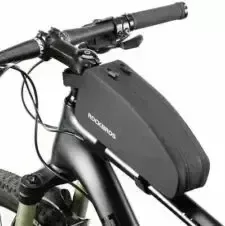
Not a whole lot goes into the top tube, it is mostly just a means of connecting the front of the bike to the back, like the rear brake cable, for example. It is useful for writing yourself encouraging messages, as it is constantly visible.
I’ve seen guys tape gels here in races, and others buy a bag to put them here, like this one from XLab. Some people like to tape cue sheets or race profiles here, so they know what to expect. Basically, you should enjoy the freedom to personalize your top tube.
Saddle
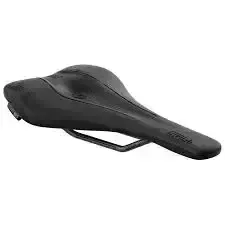
There is not a lot to say about the saddle on your bike, except that it’s very important to like the one you have or to find one you like. You will be spending a lot of intimate time with your saddle, and any minor issue you notice after 5 minutes becomes a reason for divorce after 5 hours.
Road saddles come in varying widths and lengths to accommodate riders of all shapes and sizes.
The important thing is that the saddle has support where your bones connect with it. If your weight is supported here, you will be much more comfortable on your bike. There are also saddles out there with cut-outs in the middle to relieve pressure on women or men with prostate issues. Basically, there is a saddle out there for everybody.
Front Wheel
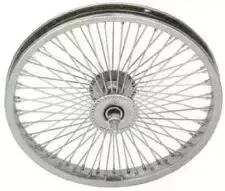
The front wheel is half the surface of your bike that actually touches the road. It’s very important to check the tire every time you get on your bike. You should make sure it’s inflated properly, check the sidewall of the tire for bars or psi, that there are no gashes or cuts in the tire, and that the top of the tire is not worn too much. it will appear flattened and square. Any of those things can lead to flats, injuries under inflation, knicks or cuts in the sidewall, and worn-out tires.
You should also spin your wheel to make sure that it is “true,” meaning that it spins in the same plane as before. If it is out of true, it will appear to wobble when you spin it, and you may hear it rubbing one side of the brakes as it passes by. Your local bike shop can fix this in under an hour if they aren’t busy, and it’s relatively inexpensive.
Fork and Front Brake
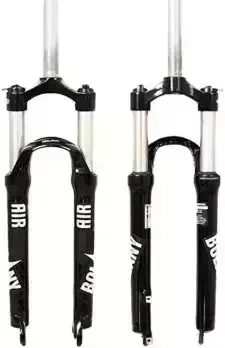
The fork on your bike is very important. The way it is designed has a significant impact on the handling characteristics of your bike. Not to mention it holds your frame up off of your front wheel – and that’s pretty important. It also holds your front brake in place, which is a very important task.
There is a cable attached to the front brake to apply it. This cable not only controls the brakes when you squeeze the lever; it also tightens and loosens the calipers for micro-adjustments.
You may notice there is a method of detaching or widening the brakes for removal of your front wheel. It is a very good idea to check that your brakes are closed and ready to ride before you set out. Bad things happen when you squeeze the brake levers and no braking happens. Don’t ask how I learned it.
Downtube
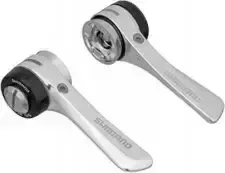
The downtube is another fairly straightforward part of the bike. It basically serves as a means of making the frame as strong as possible, and it holds the cables that control the front and rear derailleurs. Some bikes do this internally, most of them externally.
This is also the most popular place for bike manufacturers to display their logo or brand name, as it’s the largest and most visible space on the bike.
Frequently, there are two bolts on the inside of the triangle here to hold a water bottle cage. It may not be the easiest thing to balance while riding and grab a water bottle between your knees, but it’s by far the best place on a bike to keep a water bottle.
Seat Tube
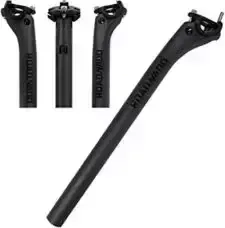
The seat tube will have a clamp mechanism at the top to receive and hold the seat post in place. You will often find decals from the manufacturer about the materials used and the size of the frame. If you’re buying a used bike, I would expect it to be there. Also, depending on the bike, you may have a second set of bolts for another water bottle cage.
This location is also good for holding bottles, but not the easiest to get to while you’re pedaling. Even harder is steering and holding a bottle with one hand while you move the other bottle from one cage to the other. Fortunately, the more you do it, the easier it gets. The seat tube is also the place where the front derailleur is actually attached to the frame.
Rear Brake and Seat Stays
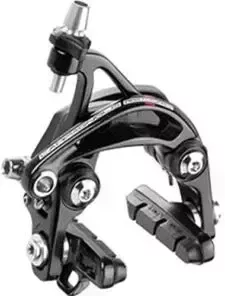
The rear brake is mounted on what are called the seat stays. While they appear to be simple, the seat stays are very important in the way the bike feels to the rider.
The way they are constructed what material, what size and other considerations affect how much road vibration they absorb or how much they pass on to the rider.
Some materials and some styles are much more dampening than others. The rear brake is likely just like the front brake and has a method of opening to allow the rear wheel to be taken out. You should always check that your brake is engaged before you get on your bike to ride. The rear brake also has a screw adjustment for fine-tuning the feel and function of your braking.
Rear Wheel
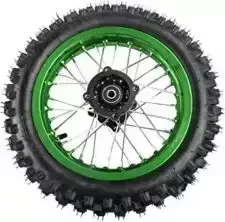
The rear wheel, while apparently the same, is a bit more complex than the front. While the rim is probably identical, the hub is much more involved.
The rear hub is equipped with a free-wheel mechanism that enables the chain to drive the wheel forward and yet is “free” to coast without requiring the pedals to turn. There is a ratcheting mechanism inside the hub that will give out a distinct clicking sound. Some are louder or more subtle than others, and you will notice that yours is likely different from everybody else’s. Depending on how old your bike is, there will be different methods of attaching the cassette, the short name for a group of gears, to the hub.
However they attach is really irrelevant here, as we are not discussing changing them. You should also be familiar with how to operate the quick-release skewers and remove the wheel. Shift to the smallest cog before removing, as it’s much easier to get the wheel out and back in this way.
Front derailleur, bottom bracket, and cranks.
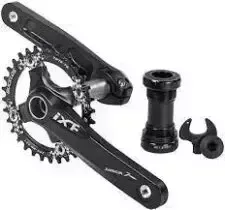
The front derailleur, cranks, and bottom bracket are pretty important to the overall machine that is your bicycle. This is the guts of the system that moves the power from your legs into the rear wheel to propel you forward. The cranks come in different lengths and with different sized gears attached to them to make pedaling feel right to you.
The front derailleur controls which chainring you are turning over and does so by way of the cage the chain passes through.
The bottom bracket may just appear to be the axis around which the pedals turn, but it is actually very influential when it comes to how well the power you put into the bicycle is dispersed.
What that means is that bigger bottom brackets, yes, unfortunately, they come in way too many different sizes, transfer power more efficiently than smaller ones, sending more of your power onto the road and losing less of it into the frame itself.
Chainstays
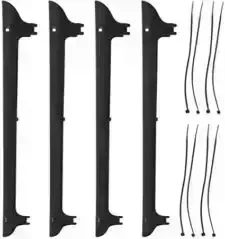
The chainstays are one of the apparently simple parts of the bike, but in fact, they are the second place that profoundly impacts how efficiently your bike transfers power into the wheel. In recent years, chainstays have become oversized and box-shaped to be more resistant to flexing. The old saying holds true, “A chain is only as strong as its weakest link”.
The chain is also a very important part of the bike, as you won’t go anywhere without it. The most important thing to know about the chain is that you must keep it dry and lubricated.
That does not mean you can’t ride it in the rain, but that you should dry the chain off as soon as you get in from a wet ride. It’s also a good idea to re-lube your chain after you have dried it from a wet ride—this will prevent rust from forming and prolong the life of the chain. If you ride frequently in dry weather, you should lubricate your chain at least every couple weeks, or every 4–5 rides.
Rear Derailleur
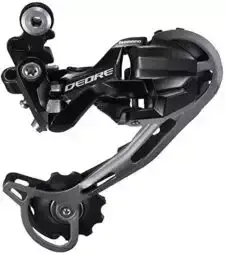
Finally, the rear derailleur is the biggest puzzle piece in terms of how hard you have to pedal in order to keep moving forward. The man who invented the derailleur was a brilliant man. It enables you to change the gear ratio of your bike on the fly, with the pull of a lever.
Genius! To prolong the life of the derailleur on your bike, be sure to shift when there is a light load on your pedals and keep your chain lubed. These two things will greatly increase the shifting speed and accuracy.
There is also a barrel adjuster to fine-tune the cable tension on the derailleur. If your bike is shifting fine, don’t touch the barrel adjuster. If your bike is hesitating to shift one direction or the other, you can micro-adjust the cable tension to fix it.
You will quickly learn which way the derailleur moves with a clockwise or counter-clockwise turn of the adjuster as the problem will either get better or worse after making an adjustment. You can download the book: Oregon Bicyclist Manual.
